Where to Put Highlighter on Face: 7 Best Spots for a Natural Glow (Ultimate Guide)


Where to put highlighter on face? Put it on the high points where light naturally hits: the tops of your cheekbones, your brow bone, the inner corners of your eyes, the bridge of your nose, and your Cupid’s bow. Use a small amount, blend the edges well, and skip areas that are already shiny, textured, or that you do not want to emphasize.
Key takeaways
- Highlighter works best on high points, not across the whole face.
- A simple 3-point routine (cheekbones, inner corners, Cupid’s bow) is the easiest place for beginners to start.
- Placement is flexible. Your face shape, skin type, and the finish you want should adjust where and how much you apply.
- Powder highlighter goes on top of makeup, while cream, stick, and liquid formulas usually go on before powder.
- Skip or soften highlighter over oily areas, visible texture, and fine lines.
Where to Put Highlighter on Face: The Simple Answer
Highlighter has one job: to reflect light and make certain areas of your face look brighter and more dimensional. where to put highlighter on face Where you place it decides whether the result looks like a healthy, lit-from-within glow or like a patch of glitter stuck to your cheek.
The reliable rule is to apply highlighter where light would naturally catch your face if the sun were hitting you from above and slightly in front. Those are the points that sit highest or stick out most. Everything else is optional.
This guide on where to put highlighter on face goes further than a basic list. It covers each area of the face, where to put highlighter on face how to adjust for face shape, what to do on oily, mature, or textured skin, the correct order of products, and the mistakes that make highlighter look harsh.
The 5 Main High Points to Highlight
These are the five spots almost every makeup artist reaches for first:
- Tops of the cheekbones. The classic placement that lifts the whole face.
- Brow bone. The area just under the arch of your eyebrow, which opens up the eye area.
- Inner corners of the eyes. A tiny dot brightens and wakes up the eyes.
- Bridge of the nose. A thin line adds a soft, sculpted look.
- Cupid’s bow. The dip above the center of your upper lip, which makes lips look fuller.
Two extra spots, the center of the chin and the collarbones, are optional additions for a more finished look.
A Simple Everyday Highlighter Placement Routine
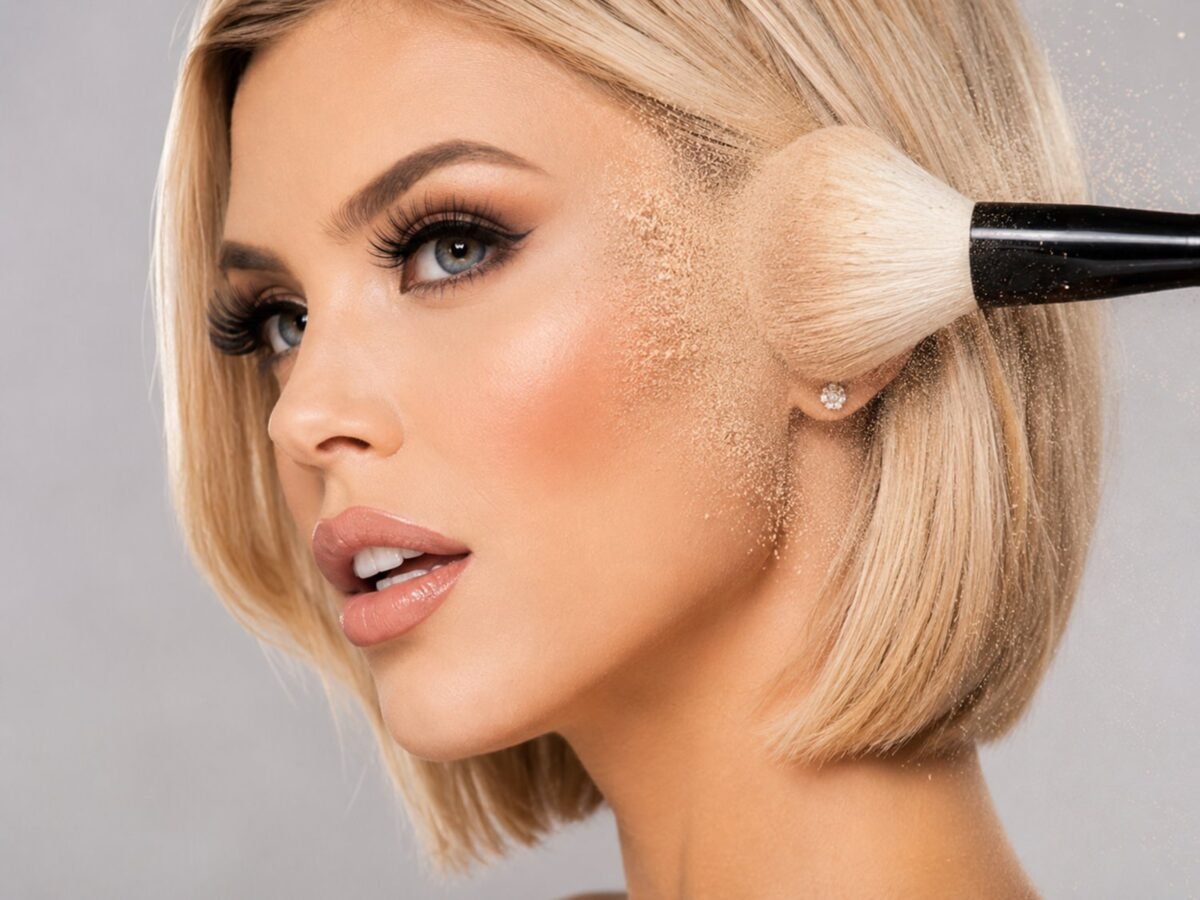
If you are new to highlighter, where to put highlighter on face do not try all seven spots at once. Start with this three-point routine, which takes about 30 seconds:
- Cheekbones: sweep a thin line along the top of the cheekbone, from the outer edge toward the middle of your cheek.
- Inner corners of the eyes: press a tiny amount into the corner nearest your nose.
- Cupid’s bow: tap a small dot in the center above your lip.
Once you feel confident, add the brow bone and nose bridge. where to put highlighter on face This beginner-friendly approach is useful because it is hard to overdo, and it works on almost everyone.
Where to Apply Highlighter on Each Part of Your Face
Here is a detailed look at each placement, including how to apply it and when to adjust.
Cheekbones
Why it works: Cheekbones are the highest point of the middle of your face, where to put highlighter on face so a glow here instantly adds lift and structure.
How to apply:
- Smile gently to find the top of your cheekbone, the rounded part that lifts when you smile.
- Apply highlighter on this high point, starting near the outer edge of your eye and moving in toward the middle of your cheek.
- Blend the edges so there is no visible line. Do not drag highlighter down into your cheek, which can emphasize the wrong area.
Pro tip: Apply blush first, then place highlighter on the bone above it. where to put highlighter on face This keeps color on the apple of your cheek and light on the bone.
Brow Bone
Why it works: A touch of light under the arch of your brow lifts the eye area and can make your brows look more defined.
How to apply: Using a small brush or your fingertip, sweep a small amount just under the arch of the eyebrow, on the bone, not on the brow hair. Blend toward the outer edge.
Watch out for: Hooded or heavily textured lids. A very shimmery product here can draw attention to creases. Choose a satin finish if you notice this.
Inner Corners of the Eyes

Why it works: The inner corner is the shadowy spot where eye meets nose. A tiny dot of light makes eyes look more awake and open.
How to apply: Use a small, fine brush or your finger tip to place a very small dot in the inner corner. A little goes a long way. Avoid getting product into the eye itself.
Safety note: Only use products labeled safe for the eye area. Some face highlighters, especially those with coarse glitter, are not meant for use close to the eyes.
Bridge and Tip of the Nose
Why it works: A thin line of highlight down the center of the nose can make it look slimmer and more defined, while a dot on the tip can add a soft lift.
How to apply: Use a small, precise brush. Draw a thin line along the bridge, slightly to the center, and blend it well. If you have oily skin on your nose, use a very small amount, or skip it.
Common mistake: Applying highlighter on the sides of the nose or too heavily. Keep it thin and centered.
Cupid’s Bow and Center of the Lips
Why it works: Highlighting the dip above your upper lip makes the lip line look fuller and more defined.
How to apply: Tap a small amount of cream or a soft powder onto the center of the Cupid’s bow. Some people also place a tiny bit at the center of the lower lip for a fuller look.
Tip: Keep the product away from lipstick edges so it does not blur your lip line.
Chin and Forehead: When to Skip Them
The center of the chin and the center of the forehead are optional highlight areas.
- Center of the chin: A small tap can balance the face and add dimension. Skip it if your chin is already prominent or your skin is oily here.
- Center of the forehead: A light touch can brighten the face, but this area gets shiny quickly. If you have an oily T-zone, you may want to skip it entirely.
If you are unsure, leave these two areas out. Fewer highlight spots usually look more natural.
Collarbone and Shoulders
If you are wearing a strapless top, a v-neck, or a dress, a soft sweep of highlighter along the collarbone and tops of the shoulders adds a glowing, where to put highlighter on face finished look. Use a body-safe or lightly shimmering product, and blend gently so it looks like natural light and not glitter.
Where to Put Highlighter on Face Based on Your Face Shape
Most guides give one rule for everyone. In reality, small adjustments can make highlighter flatter you more. where to put highlighter on face Treat these suggestions as optional starting points, not rules. Faces are individual, and what feels good to you matters most.
Round Face
Round faces tend to have soft angles and fuller cheeks. To add a lifted, more defined look:
- Place highlighter on the upper, outer part of the cheekbone, angled toward the temples.
- Add a touch on the center of the forehead and chin to draw the eye vertically.
- Avoid wide sweeps across the fullest part of the cheek.
Oval Face
Oval faces are balanced, so you can follow the standard placements almost exactly. The cheekbones, brow bone, where to put highlighter on face and nose bridge are usually enough. Adjust depending on the look you want instead of the shape.
Square Face
Square faces have a strong jawline and forehead. To soften and balance:
- Highlight the tops of the cheekbones and a bit on the center of the forehead and chin.
- Keep highlighter away from the jaw and corners of the forehead, which can emphasize angles.
Heart-Shaped Face
Heart-shaped faces have a wider forehead and narrower chin. To balance:
- Highlight the cheekbones to add width at the middle of the face.
- Place a touch on the center of the chin to add fullness.
- Keep the forehead lightly highlighted, or skip it, since it is already the widest part.
Where Not to Apply Highlighter
Knowing where to skip highlighter is as useful as knowing where to put it. These are suggestions, not strict rules. where to put highlighter on face Some people love a glossy look in all of these places.
Areas That Already Look Oily
Highlighter adds shine, so on already shiny areas it can look greasy rather than glowing. If you have oily skin, you may want to skip or reduce highlighter on the T-zone, which includes the forehead, nose, where to put highlighter on face and chin, and stick to the cheekbones. Use a powder highlighter with a satin or soft-focus finish, and set the rest of your face with a light powder to keep the contrast.
Textured Skin, Visible Pores, and Fine Lines
Shimmer and glitter can catch the light in the dips and bumps of the skin and make texture, pores, acne scars, and fine lines look more visible. where to put highlighter on face If you notice this:
- Choose a finely milled, satin, or cream formula over chunky shimmer.
- Apply only on the highest, smoothest points, like the top of the cheekbone.
- Avoid placing highlighter directly over breakouts, dry patches, deep lines, or large pores.
- Use a very small amount, and blend until the edge disappears.
On mature skin, many makeup artists prefer cream or liquid highlighters, where to put highlighter on face which tend to look more skin-like and less powdery than dry powders.
Under the Eyes
A light application right along the top of the cheekbone is fine, but placing shimmer directly under the eye, where to put highlighter on face where skin is thin and may be textured, often highlights fine lines and puffiness. If you want brightness under the eyes, use a concealer or a very soft, light-reflecting product, not glitter.
Quick Placement Chart
| Face area | Where exactly | Effect | Best formula or tool | Who may want to adjust or skip |
|---|---|---|---|---|
| Cheekbones | Top of the cheekbone, above blush | Lift and structure | Powder with a fan brush, or cream with fingers | Very textured skin: use satin or cream |
| Brow bone | Just under the arch of the brow | Opens the eye area | Small brush or fingertip | Hooded or crepey lids: keep it satin |
| Inner corner of eye | Small dot near the nose | Awake, brighter look | Fine brush or fingertip | Sensitive eyes: use eye-safe products only |
| Nose bridge | Thin line down the center | Slimmer, defined look | Small brush | Oily nose: use very little or skip |
| Cupid’s bow | Dip above the upper lip | Fuller look | Fingertip or small brush | Keep away from the lip line |
| Chin | Center of the chin | Balance | Fingertip | Oily or prominent chin: skip |
| Forehead | Center, lightly | Brightens | Soft brush | Oily T-zone: skip |
| Collarbone | Along the bone | Glowing finish | Body-safe product | Optional, depends on outfit |
How to Apply Highlighter for a Natural Finish
The right formula and tool make placement far easier. Here is how each type works.
Powder Highlighter: Brush and Placement
Powder is easy to control and long-lasting, and works well on normal to oily skin.
- Use a small fan brush or tapered brush for the cheekbones and a small, precise brush for the nose and brow.
- Tap off the excess before touching your face.
- Build up slowly with light layers instead of one heavy swipe.
Best for: oily and combination skin, quick application, and a soft glow.
Cream and Stick Highlighter: Finger or Sponge
Cream and stick formulas melt into the skin and give a dewy, where to put highlighter on face skin-like glow. They are often better for dry and mature skin.
- Dot the product on the high points, then tap and blend with your fingertips or a damp sponge.
- Apply cream highlighter before setting powder or before powder blush, so it stays soft and blended.
- Use a very small amount, because cream formulas can look wet and heavy fast.
Best for: dry skin, mature skin, a natural, dewy finish.
Liquid Highlighter: Targeted Glow
Liquid highlighters are very buildable and can be mixed into foundation or applied on their own.
- Use tiny dots on the high points, then blend with your fingers or a sponge right away, because liquids can set quickly.
- You can also mix a drop into your moisturizer or foundation for an all-over, subtle glow.
Best for: a wet, glowing look, and for layering under other makeup.
Application Order: When to Apply Highlighter
Order matters. A reliable sequence is:
- Skincare and primer
- Foundation and concealer
- Cream blush, bronzer, or contour
- Cream, stick, or liquid highlighter
- Setting powder (only where needed)
- Powder blush and bronzer
- Powder highlighter
- Setting spray
The general idea: cream and liquid products go on before powder, and powder products go on last. Some artists apply highlighter before blush for a softer look. where to put highlighter on face This depends on the effect you like, so feel free to experiment.
How Much Highlighter Should You Use?
Most people use too much. A useful guide:
- Daytime or natural look: A single light layer on the cheekbones and a dot on the inner corners.
- Evening or photos: Two thin layers on the cheekbones and brow bone, plus nose and Cupid’s bow.
- Special occasions or editorial looks: Build up the cheekbones and add the collarbones, but stay in control of the blend.
A good test: if you can clearly see where the highlighter stops, you need to blend more. If you can see sparkles from across the room in daylight, you probably need less.
Common Highlighter Placement Mistakes
| Mistake | Why it looks off | Easy fix |
|---|---|---|
| Highlighting the whole cheek | Looks like a patch of shimmer rather than a glow | Keep to the top of the bone |
| Placing it too low on the cheek | Drags the face down and emphasizes texture | Apply higher, toward the temple |
| Using chunky glitter on textured skin | Highlights pores and lines | Switch to a satin or cream formula |
| Skipping the blend | Leaves visible lines | Tap the edges with a clean brush or sponge |
| Highlighting oily areas | Looks greasy | Skip them or set with powder |
| Applying too much at once | Looks heavy and artificial | Build slowly, a thin layer at a time |
| Wrong shade | Looks ashy or too yellow | Pick a shade close to your undertone (see below) |
Picking the Right Shade
Choose a highlighter that suits your skin tone and undertone:
- Fair skin: champagne, pearl, or soft pink
- Light to medium skin: soft gold or peach
- Medium to tan skin: golden, bronze, or warm champagne
- Deep skin: rich gold, copper, bronze, or warm berry tones
A good rule is to go slightly lighter than your skin tone, where to put highlighter on face but in the same temperature (warm or cool). Test the shade on your cheekbone in natural light.
Frequently Asked Questions About Highlighter Placement
Do You Put Highlighter Above or Below Blush?
Most often, highlighter goes on the cheekbone, above the blush. Blush sits on the apples of your cheeks, while highlighter sits on the high point of the bone. They can overlap slightly at the edges, so blend where they meet.
Do You Apply Highlighter Before or After Foundation?
Highlighter usually goes after foundation and concealer. Cream, stick, and liquid highlighters are applied after foundation and before powder. Powder highlighter is applied last. You can also mix a drop of liquid highlighter into foundation for an all-over glow.
Can You Put Highlighter on Your Nose?
Yes. A thin line down the center of the bridge and a small dot on the tip are common placements. If your nose is oily or has visible pores, use a very small amount, or skip it.
Where Should Beginners Apply Highlighter?
Start with three spots: the tops of the cheekbones, the inner corners of the eyes, and the Cupid’s bow. This is quick, flattering on most faces, and difficult to overdo.
Can You Wear Highlighter Without Foundation?
Yes. Cream and liquid highlighters look especially natural on bare or lightly tinted skin. Apply to clean, moisturized skin, and blend well. If you have uneven texture, a light layer of concealer or tinted moisturizer underneath can help.
Final Thoughts
Understanding where to put highlighter on face comes down to one idea: put light where light naturally falls. Start with the cheekbones, inner corners, and Cupid’s bow. Add the brow bone and nose bridge once you are comfortable. Adjust for your face shape and skin type, blend until the edges disappear, and keep it light.
Highlighter is a tool for enhancing what you already have. Your best placement is the one that makes you feel confident, so use this guide as a starting point and experiment until it feels like you.