Natural makeup is not about wearing nothing. It is about wearing less, and wearing it where it counts. Done well, people say you look rested, healthy and glowing, not that you are wearing makeup.
The problem is that most guides show you a gallery of pretty faces and leave you to work out the rest: which product goes first, how much to use, what to do if your skin is oily, why your concealer creases, why your “natural” look is gone by lunch. This guide fixes that. Every look below comes with its time, natural makeup looks finish, natural makeup looks steps and who it suits, and the later sections cover skin types, shade matching, humid weather, removal and troubleshooting.
What you’ll find here:
- What natural makeup actually means
- 12 looks with step-by-step instructions
- The core routine, step by step
- A minimal kit at three budget levels
- Adjustments for oily, dry, mature and acne-prone skin
- Shade matching for different skin tones
- Making it last in heat and humidity
- Mistakes and fixes, removal, and FAQs
What Are Natural Makeup Looks?

Natural makeup enhances your own features without hiding your skin. It has four defining traits:
- Sheer to light coverage. Your skin texture, freckles and tone still show through.
- Colours close to your own. Blush looks like a flush, natural makeup looks lips look like your lips but better.
- Soft edges. Everything is blended, with no visible lines on the jaw, brow or lip.
- Targeted product. You use product only where it helps, such as under the eyes or around the nose, not everywhere.
Natural makeup vs. no-makeup makeup vs. soft glam
| Natural makeup | No-makeup makeup | Soft glam | |
|---|---|---|---|
| Goal | Enhance | Look bare | Polished, defined |
| Products | 3–6 | 5–8 (hidden in layers) | 8+ |
| Coverage | Sheer to light | Sheer, even | Light to medium |
| Eyes | Mascara, soft neutral | Subtle definition | Blended shadow, liner |
| Time | 3–10 min | 10–15 min | 15–25 min |
Natural makeup is the simplest. No-makeup makeup is the same idea with more precision. natural makeup looks Soft glam is a step up. Looks 11 and 12 below touch on the soft end, and they are labelled clearly so you know what you are choosing.
12 Natural Makeup Looks to Try

Each look lists time, finish, best for and steps. Use product types you already own. You don’t need specific brands.
1. Fresh and Dewy Skin
Time: 6 min | Finish: Luminous | Best for: Dry, normal or dull skin; daytime; photos
- Apply a hydrating moisturiser and wait 60 seconds.
- Press a skin tint or tinted moisturiser into the centre of the face with fingers or a damp sponge, and blend outward.
- Dab concealer only under the inner eye corners and on any blemishes.
- Tap cream blush on the apples of the cheeks.
- Add a touch of cream highlighter to the cheekbones only. Skip the forehead and nose.
- Finish with clear or tinted lip balm.
Tip: Dewy does not mean oily. Keep shine on the high points and leave the T-zone calmer.
2. Soft Matte Everyday Makeup
Time: 7 min | Finish: Smooth, low-shine | Best for: Oily or combination skin; humid days; work
- Use a mattifying or oil-control primer only on the T-zone.
- Apply a lightweight, matte-leaning base thinly, then build only where needed.
- Conceal and blend with a damp sponge.
- Press a small amount of translucent powder on the T-zone only.
- Use powder blush for the cheeks.
- Finish with a satin lip colour.
Tip: Powder everywhere flattens skin and makes it look older. Place it, don’t coat.
3. Peachy Natural Makeup
Time: 5 min | Finish: Warm, soft | Best for: Fair to medium skin with warm or neutral undertones; spring or summer
- Prep skin and apply a light base.
- Tap peach cream blush on the cheeks and a little across the nose bridge for a naturally flushed look.
- Sweep a warm beige or soft peach shade on the eyelids.
- Curl lashes and apply brown mascara.
- Finish with a peach lip tint.
Deeper skin tones: Use apricot, natural makeup looks terracotta or warm coral so the blush shows up, since pale peach can look chalky.
4. Rosy Cheeks and Blurred Lips
Time: 4 min | Finish: Soft, diffused | Best for: Minimal-makeup days; cool or neutral undertones
- Apply concealer where needed, with no full base.
- Tap a rosy cream blush on the cheeks and blend upward.
- Dab lip tint or cream lip colour in the centre of the lips with a fingertip.
- Blend outward with a clean finger so the edges look soft and stained.
Tip: natural makeup looks Berry or rose tones work on most tones. Go deeper for deeper skin.
5. No-Makeup Makeup Look
Time: 10–12 min | Finish: Even, skin-like | Best for: Interviews, meetings, anyone who wants “great skin” without looking made-up
- Moisturise and use a sunscreen suitable for your skin.
- Apply a skin tint with a sponge, using the thinnest layer that evens things out.
- Colour-correct only if needed natural makeup looks (a peach or orange corrector for dark under-eye shadows on deeper skin, a light green corrector for redness).
- Conceal, then set only the under-eye area lightly.
- Add cream blush, then a barely-there cream bronzer where the sun would hit.
- Brush brows up with a clear or tinted brow gel.
- Curl lashes, apply one coat of brown-black mascara.
- Finish with lip balm or a sheer tint.
Why it works: Every product is sheer and layered, so nothing looks heavy.
6. Soft Brown Eye Makeup
Time: 8 min | Finish: Defined but gentle | Best for: Making eyes look more awake
- Apply a neutral matte shade close to your skin tone all over the lid.
- Blend a soft brown in the outer third of the lid and the crease.
- Press a small amount of brown shadow along the upper lash line with a flat brush, in place of liner.
- Curl lashes and apply mascara to the top lashes, with one light coat on the bottom.
- Keep the rest of the face minimal: natural makeup looks sheer base, blush, lip balm.
Tip: Brown is gentler than black on most people and still adds depth.
7. Freckle-Friendly Makeup
Time: 5 min | Finish: Textured, sun-kissed | Best for: Anyone with freckles or who wants to show off skin texture
- Skip full-coverage products. Use sheer tint only where you want to even out tone.
- Tap concealer on blemishes and shadows only, not over freckles.
- Apply cream blush slightly higher on the cheeks.
- Optional: lightly dot a brow pencil that is one shade lighter than your freckles, natural makeup looks and press with a fingertip. Keep it light and random.
- Use a lip balm or tint.
Note: Powder can mute freckles, so skip it or keep it to the T-zone.
8. Warm Sun-Kissed Makeup
Time: 6 min | Finish: Bronzy, healthy | Best for: Summer, holidays, tan or deeper skin
- Apply a thin base and conceal as needed.
- Use cream bronzer on the high points of the face natural makeup looks: cheekbones, nose bridge, forehead edges.
- Add warm blush on the apples of the cheeks and blend into the bronzer.
- Apply a warm bronze or gold shadow on the lids.
- Finish with a warm nude or coral lip.
Tip: Choose a bronzer one to two shades deeper than your skin, not five. Too dark looks dirty rather than sun-kissed.
9. Minimal Makeup with Glossy Lips
Time: 3 min | Finish: Fresh, juicy | Best for: Quick errands, casual days
- Moisturise and add concealer only where needed.
- Tap cream blush on the cheeks.
- Curl lashes and use mascara.
- Apply a clear or lightly tinted gloss. Blot slightly if it feels too sticky.
10. Natural Makeup for Work or School
Time: 8 min | Finish: Neat, professional | Best for: Long days, indoor lighting
- Use a lightweight base for even tone.
- Conceal and set lightly.
- Fill in sparse spots in the brows with a pencil or gel, and brush them up.
- Apply a neutral eyeshadow wash, natural makeup looks mascara and a soft blush.
- Use a satin lip colour that is not too bright, so you can reapply easily without a mirror.
Tip: Keep lip colour and blush in a similar tone family so the face looks put together.
11. Soft Natural Makeup for Evening (soft glam end)
Time: 12–15 min | Finish: Polished, still skin-like | Best for: Dinner, events
- Use a light base and conceal precisely.
- Warm up the face with cream bronzer and blush.
- Blend a medium brown or bronze shadow across the lid and crease for more depth.
- Add mascara on top and bottom lashes.
- Choose a richer lip, such as a rose, brick or soft berry shade.
- Set only the T-zone and under-eyes, then mist lightly with setting spray.
Note: This is a step up from everyday natural. natural makeup looks It is included because people searching for natural makeup often want an evening option that still looks like their own face.
12. Quick 5-Minute Natural Makeup
Time: 5 min | Finish: Fresh | Best for: Mornings when you’re running late
Minute 1: Moisturiser or SPF.
Minute 2: Concealer under eyes and on any spots, tapped in.
Minute 3: Cream blush on the cheeks. Dab any leftover on the eyelids for a matching look.
Minute 4: Brow gel and one coat of mascara.
Minute 5: Lip tint or balm.
Five products and no base. natural makeup looks This is the look to try first if you are new to makeup.
How to Create a Natural Makeup Look Step by Step
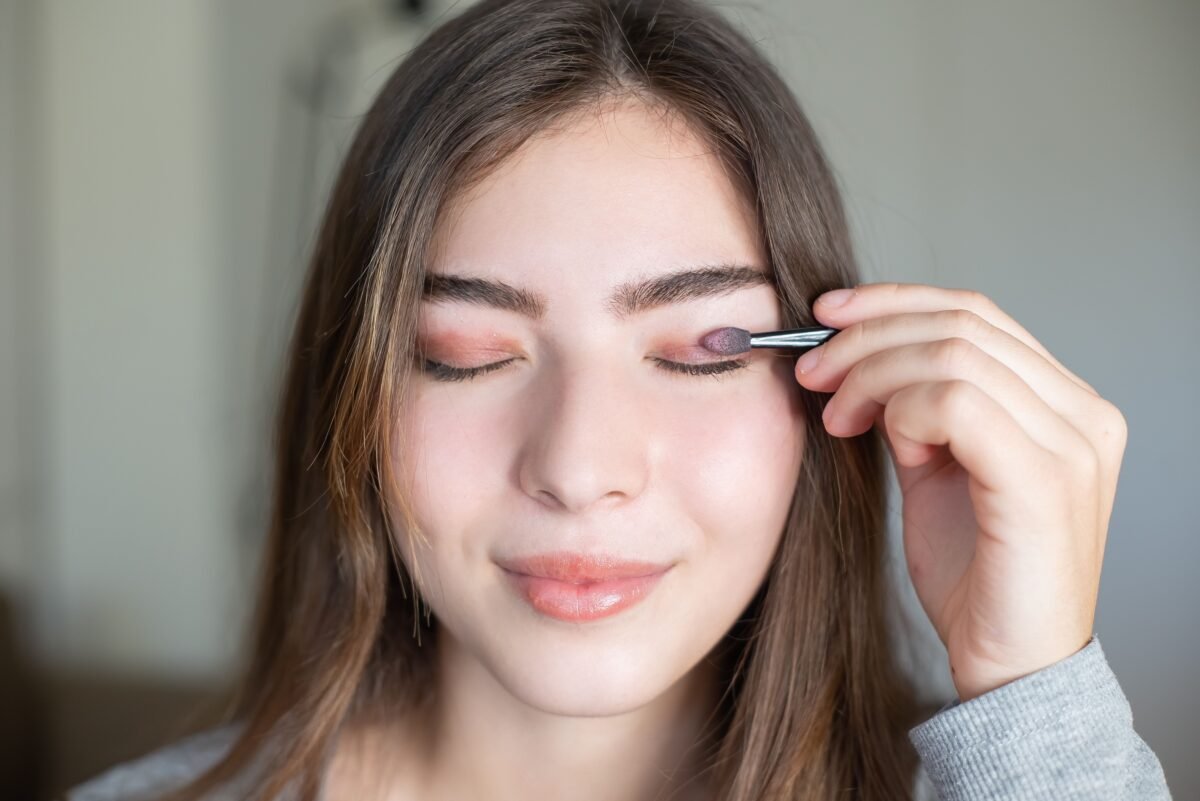
This is the core routine behind every look above. Learn it once and you can adjust it for any occasion.
Step 1: Prep and moisturise your skin
Cleanse, then apply moisturiser, natural makeup looks and wait about a minute for it to sink in. If you use sunscreen, apply it before makeup and let it set. Skin that is hydrated and not slippery holds makeup better and keeps it from looking patchy.
Step 2: Apply a lightweight base only where needed
Skip the full-face layer. Start with a pea-sized amount of skin tint or light foundation in the centre of the face (around the nose, cheeks and chin), and blend outward with a sponge or fingers. Add more only if you still see uneven areas. The edges of your face should have almost nothing.
Step 3: Conceal strategically and blend
Place concealer where you need it: inner corners of the eyes, around the nostrils, over blemishes. Tap with a fingertip or damp sponge. natural makeup looks Rubbing and dragging pushes product into lines. Use a shade that matches your skin, or one shade lighter under the eyes if you need brightness.
Step 4: Add cream blush and subtle warmth
Smile, and place a small amount of cream blush on the round part of your cheeks. natural makeup looks Blend upward and out. Cream products melt into skin and look natural. If you use powder blush, tap off the excess first.
Step 5: Define brows and eyes softly
Brush brows upward with a clear or tinted gel. Fill only sparse gaps, using light, natural makeup looks hair-like strokes. For eyes, curl the lashes and apply one or two coats of brown or brown-black mascara. Add a neutral shadow if you like.
Step 6: Finish with a natural lip colour
Tap lip tint, balm or a sheer lipstick with your finger and blend the edges. natural makeup looks Colour that is one or two shades deeper than your natural lip colour usually looks the most natural.
Best Products for a Natural Makeup Routine
You don’t need all of these. Start with the starter kit and add items as you get comfortable.
Starter kit (5 items):
- Moisturiser (and sunscreen)
- Concealer
- Cream blush or lip-and-cheek tint
- Mascara (brown or brown-black)
- Lip balm or tint
Expanded kit (add as needed):
- Skin tint or lightweight foundation
- Brow gel
- Neutral eyeshadow
- Translucent powder (small amount)
- Cream bronzer
- Setting spray
- Damp makeup sponge and a soft blush brush
Budget guide
| Level | Where to spend | Where to save |
|---|---|---|
| Low budget | Mascara, concealer in your exact shade | Blush, lip balm, brow gel from any drugstore range |
| Mid-range | Skin tint, concealer | Eyeshadow, brushes |
| Higher spend | Anything you wear daily (base, SPF) | Seasonal colours |
No-product alternatives: A little lip balm on the cheeks gives a dewy flush. Dabbing a bit of blush or lip tint on the lids creates a matching look. A clean spoolie brushed through brows makes them look fuller with zero product.
How to Make Natural Makeup Last All Day
Natural makeup is thin, so it needs smart habits instead of heavy layers.
- Start with skin that’s ready. Moisturise, then wait. Applying makeup over wet product causes patchiness.
- Layer thin coats. Two thin layers last longer than one thick layer.
- Powder only where you shine. Usually the nose, forehead and chin, in a small amount.
- Use cream products first, powder second. Cream blush followed by a light dusting of powder blush stays longer.
- Set with a light mist. Hold the bottle at arm’s length, and let it dry without rubbing.
- Blot, don’t re-powder. In heat, press a blotting paper on shiny areas, then add a touch of powder if needed.
- Carry a mini touch-up kit. Blotting papers, lip tint, a small concealer or blush stick.
In hot or humid weather:
- Choose lightweight or water-resistant formulas for the base and mascara.
- Skip heavy creams under makeup. Use a gel-type moisturiser.
- Apply less base. In humidity, thick layers slide.
- Use waterproof mascara if your lashes smudge.
- Choose stains and tints over glossy lip products that migrate.
Natural Makeup Tips for Different Skin Types and Tones
Oily skin
- Use a mattifying primer only on the T-zone.
- Choose lightweight, oil-free formulas.
- Prefer powder blush over cream on the cheeks if cream slides.
- Blot, then add a pinch of powder.
Dry skin
- Moisturise well and give it time to absorb.
- Choose cream or liquid products. Powders can cling to dry patches.
- A hydrating primer or a few drops of facial oil mixed into your tint (if suitable for your skin) can help.
- Skip heavy powder, especially under the eyes.
Combination skin
- Treat zones differently: matte on the T-zone, dewy on the cheeks.
Mature skin
- Use thin layers. Heavy product settles into lines.
- Prefer cream blush and cream highlighter in small amounts.
- Choose a satin finish over fully matte.
- Tap concealer instead of dragging it, and avoid powdering the under-eyes heavily.
Acne-prone and textured skin
- Look for labels such as “non-comedogenic”, but patch-test and watch how your own skin reacts. Labels are not a guarantee.
- Pat concealer onto blemishes with a clean fingertip or a clean sponge, and let it sit for a few seconds before blending.
- Don’t try to hide texture completely. Heavy coverage often makes texture more obvious. A thin, even layer with a soft finish looks smoother.
- Keep brushes and sponges clean, and wash them regularly.
- If your skin is inflamed or you have persistent acne, a dermatologist can advise on skincare. Makeup is not a treatment.
Shade matching for different skin tones
- Test on your jawline and neck, not the back of your hand. The right shade seems to disappear.
- Check undertone. Gold or yellow tones usually suit warm shades, pink or red tones suit cool, and a mix suits neutral. Veins and jewellery are rough clues only. Testing in natural light is more reliable.
- Look at it in daylight. Store lighting can mislead.
- For blush: Fair skin often suits soft pink or peach, medium skin suits rose, coral or warm berry, and deep skin suits rich berry, terracotta or deep coral.
- For concealer under eyes: Match your skin, or go slightly lighter, but not chalky. On deeper skin tones, a peach or orange-toned corrector can neutralise dark circles before concealer.
- Match across seasons. If you tan, you may need a deeper shade in summer.
Common Natural Makeup Mistakes and How to Fix Them
| Mistake | Why it happens | Fix |
|---|---|---|
| Foundation looks like a mask | Too much product, or wrong shade | Use less, blend with a damp sponge, and re-check your shade in daylight |
| Concealer creases | Too much product, or too much powder | Use a thinner layer, tap it in, and set lightly |
| Blush looks harsh | Heavy hand or wrong tone | Tap off excess, blend upward, and switch to cream |
| Face looks grey or ashy | Base too light, or powder too white | Choose a better shade match, and use translucent or tinted powder |
| Makeup looks patchy on dry skin | Skincare not absorbed, or powder over dry areas | Moisturise earlier, and skip powder on dry patches |
| Makeup slides off in heat | Too many layers, rich moisturiser | Use thin layers, a gel moisturiser and a light mist |
| Eyes look tired | Dark circles uncovered, or no mascara | Colour-correct if needed, conceal, then curl and mascara |
| Brows look drawn on | Heavy pencil | Use gel and short hair-like strokes |
| Lips look flat | No definition at all | Press a tint into the lip centre and blend |
| Makeup “disappears” by noon | Too sheer, or not set | Place powder where you shine, and mist lightly |
Makeup Removal and Skin Hygiene
Natural makeup is light, but it still needs removing.
- Remove it every night. Use a cleansing balm, oil or micellar water, then a gentle cleanser if your skin needs a second step.
- Be gentle around the eyes. Press a soaked cotton pad on the lashes for several seconds so the mascara loosens, then wipe softly.
- Clean your tools. Wash brushes about once a week and sponges more often, and let them dry fully. Dirty tools can irritate skin.
- Don’t share eye or lip products.
- Check expiry. Mascara and liquid products have a limited life, so replace them as the packaging recommends.
FAQs
What products do you need for a natural makeup look?
At minimum: moisturiser, concealer, a cream blush or tint, mascara and lip balm. Skin tint, brow gel and a neutral eyeshadow are useful additions.
How do you make foundation look natural?
Use a thin layer, apply it mostly in the centre of the face, and blend outward with a damp sponge. Choose a shade that matches your jawline in daylight, and avoid heavy powder.
How can beginners do natural makeup?
Start with the 5-minute routine (Look 12). Concealer, blush, mascara and lip tint are easy to learn and hard to overdo. Add more steps once you are comfortable.
Is natural makeup the same as no-makeup makeup?
They are related. Natural makeup enhances, and no-makeup makeup uses more careful layering to look completely bare. Natural makeup is generally simpler.
How do you make natural makeup last all day?
Prep skin well, use thin layers, powder only the areas that get shiny, set lightly with a mist, and carry blotting papers and a lip tint for touch-ups.
Which shades look natural on different skin tones?
Pick colours close to your own flush and lip tone. Peach and soft pink often suit fair skin, rose and coral suit medium skin, and rich berry and terracotta suit deeper skin. Always test in daylight.
Final Thoughts
The best natural makeup look is the one that makes you feel like yourself on a good day. Start with the 5-minute routine, learn how your skin responds to different textures, and add products only when you find a gap. Once you understand placement, texture and shade, you can build any of the looks above with whatever you already own.