How to Choose Hiking Boots: A Complete 2026 Guide to Types, Fit and Features


Learning how to choose hiking boots is the most important gear decision you will make before a hike. The wrong pair gives you blisters, bruised toes and tired ankles. The right pair disappears on your feet, so you can look up at the view instead of thinking about your heels.
The challenge is that the market is huge. There are boots, shoes, trail runners and approach shoes, in leather, synthetic fabric and mixed builds, with or without waterproof membranes, in dozens of cuts and stiffness levels. Most guides either push you toward one brand or list technical terms without telling you what to do with them.
This guide takes a different approach. You will follow a clear seven-step process, see tables that compare options side by side, learn how to measure and test fit, how to choose hiking boots and get honest advice on waterproofing, price, foot type, break-in and care. It is brand-neutral, written for hikers anywhere in the world, and gives both metric and imperial measurements.
Quick Answer
If you only have 30 seconds, use this table. Find your kind of hike, then read the rest of the guide to fine-tune the choice.
| Your hike | Best footwear | Why |
|---|---|---|
| Short, groomed trails, light daypack | Trail runners or low-cut hiking shoes | Light, breathable, no break-in |
| Day hikes on rocky or muddy trails | Mid-cut day hiking boots | Ankle support and protection without extra weight |
| Multi-day trips with a loaded pack | Backpacking boots (mid or high cut, stiffer sole) | Support and durability under heavy loads |
| Snow, glaciers, steep alpine terrain | Mountaineering boots | Stiff soles, insulation and crampon compatibility |
| Hot, dry or humid weather | Breathable (non-waterproof) shoes or boots | They dry fast and let heat escape |
| Cold, wet or snowy weather | Waterproof boots | They keep feet dry and warm |
Key Takeaways
- Start with the hike, not the boot. Terrain, distance, pack weight and weather decide what you need.
- Fit matters more than brand, price or reviews. A boot that fits your foot is worth more than a better-rated boot that does not.
- Waterproof is not always better. It helps in cold and wet conditions but can make feet hotter and slower to dry in warm weather.
- Try boots on in the afternoon or evening, with the socks you will hike in. Feet swell during the day.
- Break in leather and stiff boots before a big trip. how to choose hiking boots Skipping this is the fastest route to blisters.
- Replace boots when the midsole feels dead, the outsole lugs are worn smooth or the upper is cracking, not by a calendar date.
How to Choose Hiking Boots: 7 Steps at a Glance
- Define your hike: terrain, distance, pack weight and season.
- Pick the footwear type: trail runner, hiking shoe, day boot, backpacking boot or mountaineering boot.
- Choose the cut: low, mid or high.
- Match the materials: leather, synthetic or a mix.
- Decide on waterproofing: based on climate, not habit.
- Get the fit right: measure, try on in the afternoon, test on a slope.
- Break in and care for them: so they last and do not hurt you.
The sections below walk through each step.
Step 1: Know Your Hike
Before looking at a single boot, how to choose hiking boots answer four questions about how you will use it.
Terrain. Hiking terrain falls roughly into three levels:
- Easy: paved, gravel or well-groomed paths with gentle slopes and few obstacles.
- Moderate: trails with roots, rocks, mud or shallow stream crossings, and some climbing and descending.
- Rugged: steep, loose or unmarked ground, scrambles, boulder fields and unpredictable surfaces, sometimes with snow or ice.
Distance and duration. A two-hour walk and a ten-day trek ask very different things of your feet. The longer you walk, the more cushioning, support and durability matter.
Pack weight. The heavier your load, the more support you need underfoot. As a rough guide, a pack under about 10 kg (22 lb) suits light footwear. A pack of 10 to 15 kg (22 to 33 lb) is where mid-cut boots with a stiffer sole start to help. how to choose hiking boots Above that, especially on rough ground, backpacking boots are the safer choice.
Season and climate. Heat, cold, rain, snow and humidity all change which materials and waterproofing make sense (more on that below).
Write down your answers. They are the filter for every decision that follows.
Types of Hiking Footwear Compared

Here is a side-by-side view of the main categories.
| Type | Weight | Support | Durability | Breathability | Break-in | Best for |
|---|---|---|---|---|---|---|
| Trail runners | Lightest | Low | Lower (wear out sooner) | Excellent | None | Fast hikes, easy to moderate trails, light packs |
| Hiking shoes | Light | Low to moderate | Moderate | Good | Minimal | Day hikes, easy to moderate terrain |
| Day hiking boots | Medium | Moderate | Good | Moderate | Short | Day hikes and short trips on rougher trails |
| Backpacking boots | Heavier | High | High | Lower | Longer | Multi-day trips, heavy packs, rugged terrain |
| Mountaineering boots | Heaviest | Highest | Very high | Low | Long | Snow, ice and alpine routes with crampons |
Trail Runners
Trail runners are lightweight running shoes with grippy soles. how to choose hiking boots They dry quickly, need no break-in and are very popular with long-distance hikers who carry light packs. The trade-offs are less ankle support, less protection from rocks and a shorter lifespan than boots.
Hiking Shoes
Hiking shoes are low-cut shoes with tougher uppers and stiffer soles than trail runners. how to choose hiking boots They suit day hikes, travel and warm weather. They give your ankles freedom but offer little support under heavy loads.
Day Hiking Boots
Day boots are usually mid-cut with moderately stiff soles. how to choose hiking boots They protect your ankles from rocks and roots, usually need a short break-in and handle light to moderate loads. For most casual hikers who walk varied trails, this is the sweet spot.
Backpacking Boots
Backpacking boots have stiffer midsoles, sturdier uppers and often a higher cut. how to choose hiking boots They are built to carry heavier loads over multiple days. They weigh more and take longer to break in, but the support makes a real difference when you are carrying a full pack.
Mountaineering Boots
Mountaineering boots are for snow, ice and technical alpine terrain. how to choose hiking boots They are very stiff, often insulated, and designed to work with crampons. They are overkill, and uncomfortable, for ordinary hiking.
How to Choose Hiking Boots by Terrain and Pack Weight
Use this table to match your answers from Step 1 to a type of footwear.
| Terrain | Light pack (under 10 kg / 22 lb) | Medium pack (10 to 15 kg / 22 to 33 lb) | Heavy pack (over 15 kg / 33 lb) |
|---|---|---|---|
| Easy | Trail runners or hiking shoes | Hiking shoes or light day boots | Day or backpacking boots |
| Moderate | Hiking shoes or mid-cut day boots | Mid-cut day or backpacking boots | Backpacking boots |
| Rugged | Mid-cut boots with a stiffer sole | Backpacking boots | Backpacking boots, or mountaineering boots for snow and ice |
These are guidelines, not laws. A strong, experienced hiker on a dry trail may be happy in trail runners with a heavy pack. how to choose hiking bootsSomeone recovering from an ankle injury may prefer boots on easy terrain. Use the table as a starting point, then adjust for your body and experience.
Low-Cut, Mid-Cut or High-Cut: Which Is Right for You?
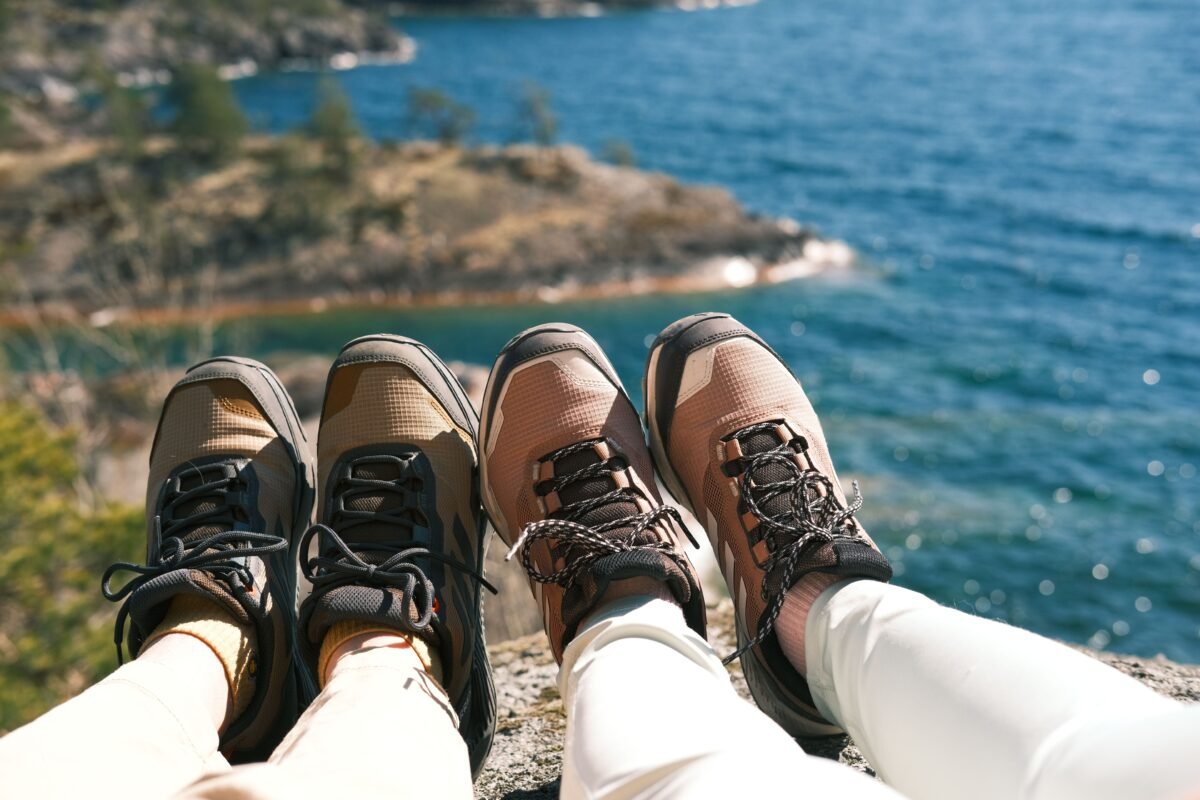
The cut is the height of the boot around your ankle.
- Low-cut stops at or below the ankle bone. It is light, flexible and breathable, and allows free ankle movement. It gives little protection from debris, mud or shallow water, and little support.
- Mid-cut rises a few centimetres (roughly 2 inches) above the ankle bone. It offers a good balance of support, protection and weight, which is why it is the most popular choice.
- High-cut rises higher still, with a stiffer collar. It gives the most support and keeps out debris and snow, but is heavier and can feel restrictive.
A common myth is that a higher boot prevents sprained ankles. In reality, strong ankles, good balance and careful footwork matter at least as much. how to choose hiking boots Boots with a stiffer collar can help if you are carrying a heavy pack, have weak or previously injured ankles, or are walking on rough, uneven ground. If your ankles are strong and the terrain is moderate, low or mid-cut is usually enough.
Materials and Construction
Boots are built from several layers, and each one changes how the boot feels and performs.
Uppers
The upper is everything above the sole.
| Material | Pros | Cons |
|---|---|---|
| Full-grain leather | Very durable, supportive, good water resistance, can be resoled | Heavier, less breathable, needs a long break-in and regular care |
| Nubuck leather | Durable, flexible, water resistant | Needs break-in, stains more easily |
| Split-grain leather with fabric | Lighter, more breathable, lower cost | Less durable and less water resistant on its own |
| Synthetic (nylon, polyester) | Light, quick to dry, minimal break-in, usually cheaper | Can wear faster, more seams to fail |
Vegan options are available in many ranges. They use synthetic materials and animal-free adhesives instead of leather.
Midsoles
The midsole provides cushioning and stiffness. Two common materials are EVA foam, which is softer, lighter and cheaper, and TPU, how to choose hiking boots which is firmer and more durable and tends to appear in boots built for heavier loads. Some boots add a shank, a thin stiffening plate that increases support under heavy packs, or a rock plate that protects your feet from sharp stones.
Outsoles and Lugs
The outsole is the rubber that touches the ground. Its lugs (the raised bumps) decide how well you grip.
| Conditions | What to look for |
|---|---|
| Dry, packed trails | Moderately deep lugs |
| Mud and steep slopes | Deep, widely spaced lugs that shed mud |
| Rocky, uneven ground | Deep, multidirectional lugs |
| Snow and ice | Deep, aggressive lugs (and crampon compatibility for serious ice) |
| Wet, smooth rock | Shallower, more closely spaced lugs for more surface contact |
Harder rubber lasts longer but can feel slippery on wet rock. Softer rubber grips better but wears faster.
Waterproof or Breathable: How to Choose Hiking Boots for Your Climate
This is the most debated question in boot shopping, how to choose hiking boots and the answer is simple once you stop treating it as a rule. Waterproof membranes (such as Gore-Tex or similar) keep water out but also slow the escape of sweat and heat. Your choice should depend on climate.
Choose waterproof when:
- It is cold, wet or snowy, and wet feet would become cold feet.
- You will walk through puddles, wet grass, mud or shallow streams often.
- You hike in shoulder seasons with unpredictable weather.
Choose breathable (non-waterproof) when:
- It is hot, dry or humid. Your own sweat is the main source of moisture.
- You expect to cross deep streams. Water will come over the top of any boot, and a waterproof boot will hold it in, while a breathable one drains and dries.
- You value fast drying and low weight.
Two extra points that most guides skip. First, water can enter from the top, so trousers and gaiters matter. A waterproof boot with rain running down your leg will fill up like a bucket. how to choose hiking boots Second, membranes lose effectiveness as they age and as dirt clogs the fabric, so waterproofing needs regular care.
If you live somewhere with all four seasons, many hikers keep two pairs: breathable shoes for summer and waterproof boots for the rest of the year.
How to Choose Hiking Boots That Fit
Fit is the most important factor, and the one people get wrong most often. A well-fitting boot should feel snug everywhere and tight nowhere.
Step 1: Measure Your Feet
Measure both feet, standing, in the late afternoon. Stand on a sheet of paper, mark the longest toe and the heel, and measure the distance. Also note the width. Use the larger foot. how to choose hiking boots Many people have one foot that is slightly bigger.
Here is an approximate conversion. Always check the brand’s own size chart, because sizing varies between makers.
| Foot length (cm) | Foot length (in) | US men’s | UK | EU |
|---|---|---|---|---|
| 25.0 | 9.8 | 7 | 6 | 40 |
| 26.0 | 10.2 | 8 | 7 | 41 |
| 27.0 | 10.6 | 9 | 8 | 42 |
| 28.0 | 11.0 | 10 | 9 | 43 |
| 29.0 | 11.4 | 11 | 10 | 44 to 45 |
| 30.0 | 11.8 | 12 | 11 | 46 |
For women’s sizes, a US women’s size is typically about 1.5 sizes higher than the equivalent US men’s size. Check the brand chart rather than converting yourself.
Step 2: Try Them On at the Right Time
Feet swell during the day and during activity, so try boots on in the afternoon or evening. Wear the socks you will actually hike in, not thin dress socks.
Step 3: Check Length
With the laces undone and your toes pushed to the front, you should be able to fit about one finger behind your heel. A common alternative is to remove the insole, how to choose hiking boots stand on it and check that you have roughly a thumb’s width in front of your longest toe. Your toes should never press against the front, especially when walking downhill.
Step 4: Check Width and Volume
The boot should hold your foot without squeezing the sides of your forefoot. If you can lace the boot firmly and still feel lots of empty space above your foot, the volume is too large. If you feel pressure on the top or sides, it is too small or too narrow.
Step 5: Check the Heel
Lace the boots firmly and walk around. Your heel should stay in place with only a tiny amount of lift. Heel slip is the main cause of blisters.
Step 6: Test on a Slope
Walk up and down an incline or stairs, or use the store’s test ramp. On the downhill, your toes should not hit the front. On the uphill, your heel should not rise much.
Step 7: Walk Around for 15 to 20 Minutes
Do not rush. Spend time in the boots, and note any hot spots, pinching or pressure points. If something is wrong in the shop, it will be much worse after 10 km.
Extra Fit Tips
- Socks: use hiking socks in wool or synthetic fibres, not cotton. Cotton holds moisture and promotes blisters.
- Insoles: the insoles supplied with most boots are basic. Aftermarket insoles can improve support and fit.
- Orthotics: bring them when you try on boots, since they change the fit.
- Buying online: order two sizes if the retailer has easy returns, try them indoors on a clean surface, and keep tags until you are sure.
- Between sizes: go with the larger size and add an insole or thicker socks. It is easier to take up space than to create it.
Foot Type Guide: Wide, Narrow, Flat and High-Arch Feet
Most fit problems come from ignoring foot shape.
- Wide feet: look for brands that offer wide widths or a roomy toe box. Avoid cramming a wide foot into a standard width, which causes blisters and numb toes.
- Narrow feet: choose models with a lower-volume fit, and use thicker socks or a thicker insole if needed.
- Flat feet or low arches: look for firm midsoles and supportive insoles. Very soft, flexible shoes can feel tiring over long distances.
- High arches: look for cushioned insoles that fill the space under the arch, and avoid very rigid boots that create pressure points.
- Wide forefoot, narrow heel (or the reverse): try several brands. Each uses a different last (foot model), and the right match may be a brand you never considered.
If you have persistent pain, previous injuries or a medical foot condition, see a podiatrist or a specialist boot fitter before buying.
Hiking Boots for Women vs Men
Women’s boots are not just smaller men’s boots. Women’s lasts are typically narrower in the heel and ball of the foot, with a different volume and often a lower cuff height to match the calf. how to choose hiking boots Many women with narrower heels find men’s boots slip, while some women with wider feet find men’s boots fit better. The rule is the same as always: try both. If a men’s model fits you well and you have the right size, there is no reason not to wear it.
Be cautious with advice such as “always go a size up.” Sizing depends on the brand and your foot, so use the fit tests above rather than a blanket rule.
How to Break In Hiking Boots
Breaking in lets the materials soften and mold to your foot. Trail runners and light hiking shoes need almost none, while leather and stiff boots need time.
- Wear them at home for a few hours over several days, with your hiking socks.
- Walk on mixed ground for 30 to 60 minutes, including hills and stairs.
- Increase gradually. Do longer walks over a few weeks, until you can go for several hours with no hot spots.
- Carry a pack similar to your real load on at least one longer training walk.
- Deal with hot spots immediately. Stop, dry your foot, and apply tape or a blister plaster before the skin breaks.
Give stiff leather boots at least a couple of weeks of regular use before a major trip. If the boots hurt in a way that does not improve, they are the wrong boots. Break-in cannot fix a bad fit.
Budget Guide: What to Expect at Each Price Level
Prices vary by country and season, so treat these ranges as rough guidance in US dollars.
| Level | Approx. price | What you typically get |
|---|---|---|
| Entry | $60 to $120 | Basic synthetic boots or shoes, short lifespan, fine for occasional hikers |
| Mid-range | $120 to $220 | Better materials, waterproof options, sturdier soles, the sweet spot for most hikers |
| Premium | $220 and above | Leather or high-end synthetics, durable soles, resolable construction, specialist fits |
A few tips for spending wisely:
- Spend on fit first. A $90 pair that fits beats a $250 pair that does not.
- Buy last season’s models, which often cost much less with little real difference.
- Consider resolable leather boots if you hike a lot. They cost more upfront but can last many years.
- Be careful with suspiciously cheap deals from unknown sellers online. Counterfeit and low-quality copies of popular brands exist, and the build quality can be poor.
Common Mistakes When Choosing Hiking Boots
- Buying for looks or brand. The best-looking boot is not always the best fit for your foot.
- Buying too small. Toes that touch the front will hurt on descents.
- Trying them on in the morning. Feet swell later in the day.
- Wearing the wrong socks in the shop. Thin socks change how the boot feels.
- Choosing waterproof by default. In hot weather, it can make your feet hotter and wetter.
- Choosing boots that are too stiff for the hike. A mountaineering boot on a day hike is miserable.
- Skipping break-in. New leather boots on a big trip is a classic blister recipe.
- Ignoring foot shape. Width, arch and volume matter as much as length.
- Never replacing the insoles. Worn insoles lose support and cause fatigue.
- Not checking the return policy. If you buy online, make sure you can return worn-indoors boots in case of a bad fit.
When to Replace Your Hiking Boots and How to Care for Them
Boots do not have an expiry date. Replace them based on condition, not just distance. Warning signs include:
- The midsole feels flat or lifeless, and your feet get tired or sore sooner than before.
- The lugs on the outsole are worn smooth, so you slip on terrain that used to be fine.
- The upper is cracked, split or separating from the sole.
- The waterproofing no longer works even after cleaning and re-treating.
As a rough guide, trail runners often last in the range of 500 miles (about 800 km), while well-made boots can last roughly 800 to 1,200 km (500 to 750 miles) or more, especially if the soles can be replaced. Terrain, pack weight, your own weight and care all change those numbers.
Care Tips
- Clean after use. Brush off dirt, and rinse with water if needed. Do not use harsh detergents.
- Dry naturally. Remove the insoles and let boots dry at room temperature, away from heaters or direct flames, which can damage glue and leather.
- Condition leather with a suitable wax or conditioner, as the maker recommends.
- Re-treat waterproofing as needed, since water-repellent finishes wear off.
- Store in a cool, dry place, not in a damp car boot or a plastic bag.
- Resole when possible. If you own leather boots with a replaceable sole, it is often cheaper and more sustainable than buying new.
Frequently Asked Questions About How to Choose Hiking Boots
What is the most important factor when choosing hiking boots?
Fit. The best boots are the ones that match your foot shape and hold your heel without squeezing your toes. After fit, consider terrain, pack weight and climate.
Are hiking boots better than hiking shoes?
Not always. Boots offer more ankle support, protection and stiffness, which helps with heavy packs and rough ground. Shoes are lighter, cooler and quicker to dry, which suits easy to moderate trails and warm weather. Choose based on your hike, not on a fixed rule
Should hiking boots be a size bigger?
Not as a blanket rule. You need room for your toes, with about a finger of space behind your heel when your toes touch the front, but too much space causes heel slip and blisters. If you fall between sizes, the larger size with an insole is usually safer.
Do I need waterproof hiking boots?
It depends on climate. Waterproof boots make sense for cold, wet or snowy conditions. In hot weather, breathable shoes or boots are often more comfortable because they dry faster.
How should hiking boots fit?
Snug in the heel and midfoot, with room to wiggle your toes and no pressure points. Your heel should lift only slightly when you walk uphill, and your toes should not touch the front on downhills.
Conclusion
Choosing hiking boots comes down to a simple sequence. Decide what kind of hiking you do, pick the matching type and cut, choose materials and waterproofing for your climate, and spend the most time on fit. Then break in your boots, take care of them, and replace them when they stop protecting you.
If you remember nothing else, remember these four things: fit beats everything, try boots on late in the day with your hiking socks, do not choose waterproof out of habit, and never start a big trip in brand-new boots.